
Creating the Member API Keys (Halo)
1. API Member Creation
a. Create a New Agent
- Navigate to Configurations > Teams and Agents > Agents
- Click on the New button at the top right
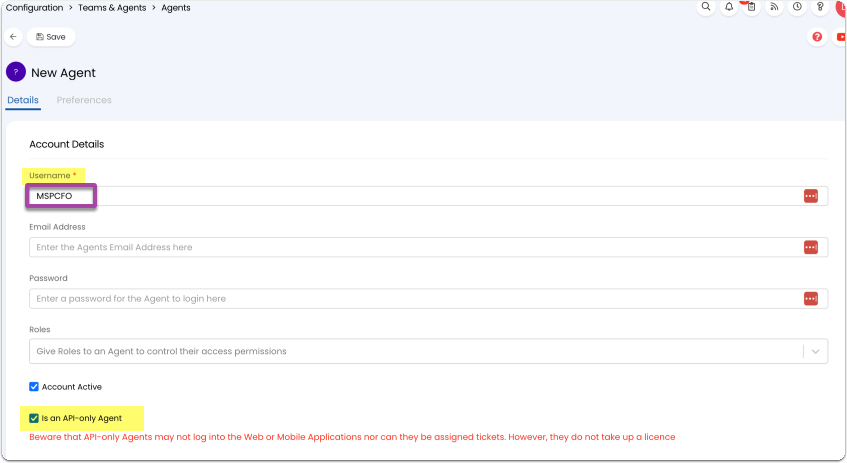
- Name the agent, e.g., MSPCFO.
- Ensure the "Is an API-Only Agent" checkbox is selected.
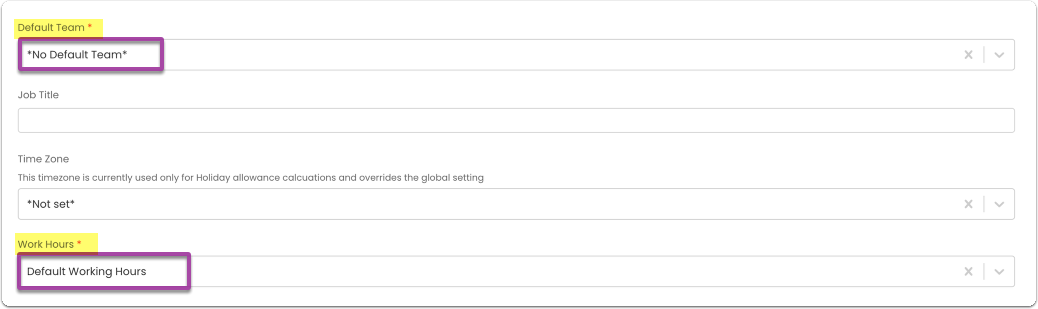
- Provide default values for the mandatory fields: Default Team and Work Hours.
b. Setting the Correct Permissions
- Within the agent profile, find the Permissions tab and click Edit.
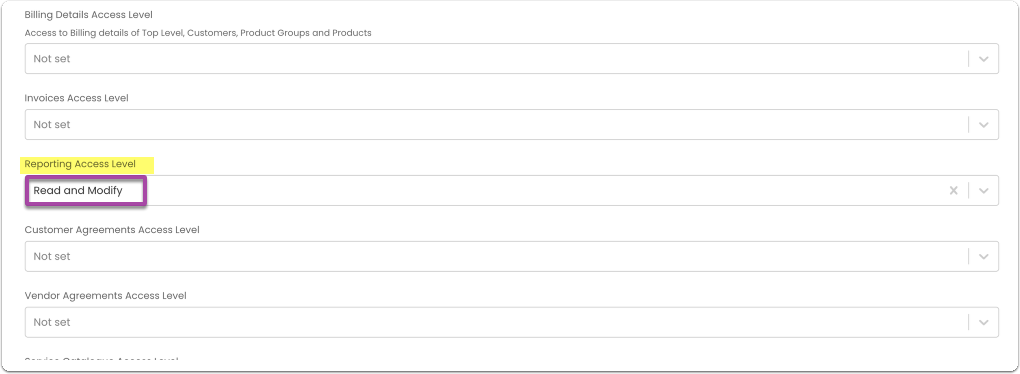
- Under Feature Access, find Reporting Access Level Access and select Read and Modify
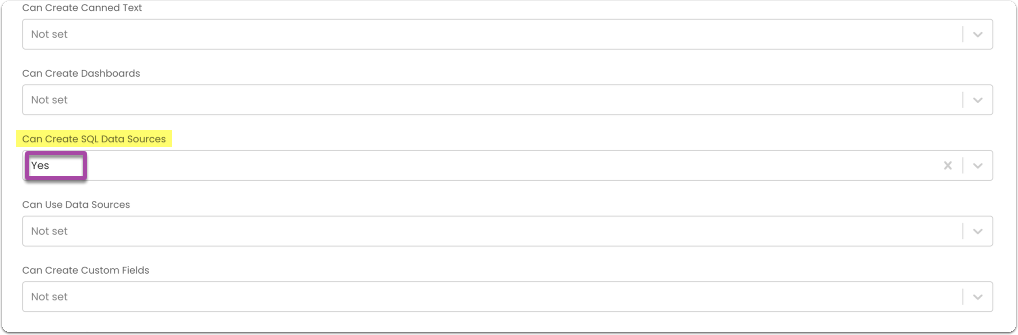
- On the same page, set Can Create SQL Data Sources to Yes
2. API Application Setup
a. Accessing the API Configuration
- From the Halo homepage, go to Configurations, then Integrations, and select HaloPSA API.
- Copy and paste the Resource Server, Authorization Server and Tenant
- Click on View Applications.
b. Creating a New Application
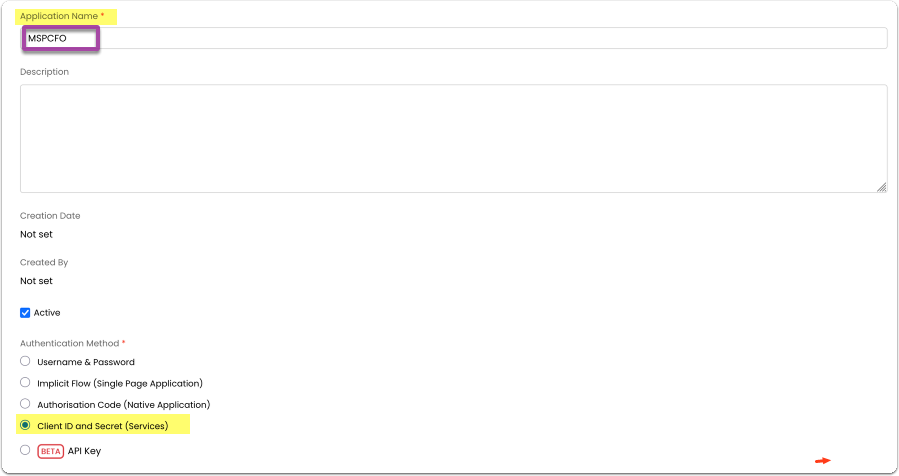
- Click the New button on the top right.
- Name the application as MSPCFO.
- For the Authentication Method, choose Client ID and Secret.
- This will generate a Client ID and Client Secret.
- This will generate a Client ID and Client Secret.
c. Setting the Login Type and Permissions
- For the login type, select Agent and pick the agent you created in step 1.
- Enter the Client ID and Secret in the MSPCFO form, then you can save the page on Halo.
d. Adding permissions to the API Application
- At the top of the page, click Permissions and Edit
- Search for "Reporting" and select read:reporting & edit:reporting, then save your changes.
Once you've done all that, you can submit the form in MSPCFO. Select the trial plan and we'll contact you with the next steps.
If you're getting an error, please let us know, and we'll troubleshoot your issues.
0 Comments
Add your comment